This procedure explains how to set up an activity for product types, i.e. on product type level. If you enable an activity here, then by default it will be enabled for all products of the corresponding product type in your fleet. If some corresponding products of your fleet's vessels do not need a particular activity or an activity which must be further adapted for individual products on certain vessels, you can disable or adapt it later.
Important information about editing and deleting activities across your fleet:
•If you edit a job across your fleet, then the new settings are applied to all vessels for which the job is enabled and for which the new settings do not concern settings which have been individualized for specific vessels.
•If you delete a job across your fleet, then the job is deleted on all vessels, for which the job is enabled and regardless whether some settings have been individualized for specific vessels.
1.Go to menu "Maintenance" > "Admin jobs fleet".
2.Select a product category in the tree on the very left of the screen. On the right side, you will see a table "Job settings for '____' products" showing all existing maintenance activities across your fleet on product type level.
3.Select a product in the upper right table. This will list all existing maintenance activities for that product type in the lower right table.
4.Click the button "Add" below the table "Job activities". This will open a form called "Details", which allows you to set up the new maintenance activity. If you want to add an activity that with an interval based on running hours, the ticker in the column RH must be set. The crew will be able to enter the running hours of products of that type.
5.Fill in the details form according to the explanations in Description of PMS settings.
6.Click "Save".
7.If you need to add one or several documents, select the relevant job and click "Select instructions" . Documents are managed through the DMS.
8.If you need to assign a specific job card to the Maintenance activity, select the relevant job and click "Select JC". Choose a job card in the column "Selection" and click "OK".
If there is no specific job card for the maintenance activity, then just skip this step. The default job card will be assigned to the maintenance activity.
|
Best Practice: If no measurements have to be taken and noted down, it is not useful to enter jobs with a very short interval (i.e. daily jobs). To reduce useless paperwork, combine daily jobs into weekly jobs, where the crew can confirm once a week, that the job was carried out daily. If requested, MESPAS can create company specific job cards for such jobs. |

Copy PMS settings
You may copy existing PMS settings from one Product type to another one if it belongs to the same product category (e.g. pumps). This function is not available for jobs on vessel- or part level.
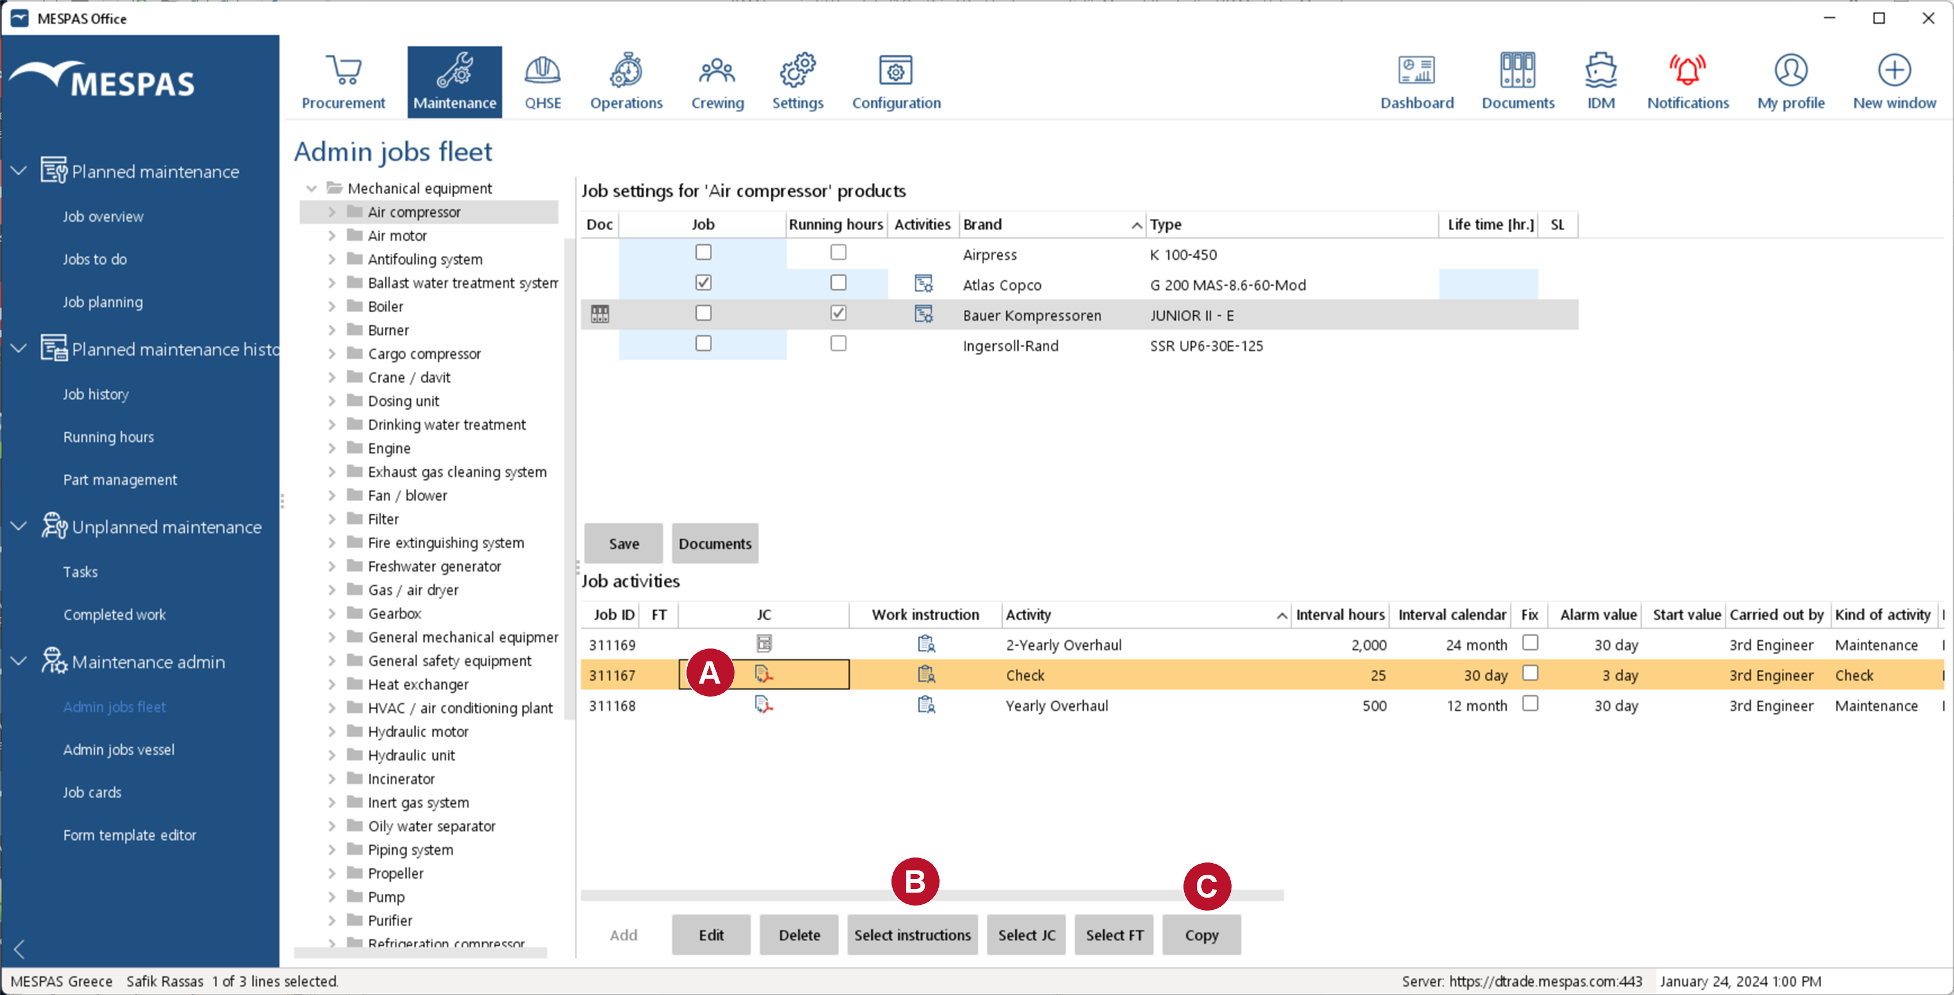 |
1.Select an existing PMS setting on product type level as described above in the paragraphs. 2.Check in the column "Work instruction" if there are work instructions attached to this PMS setting 3.Click on "Copy"
|
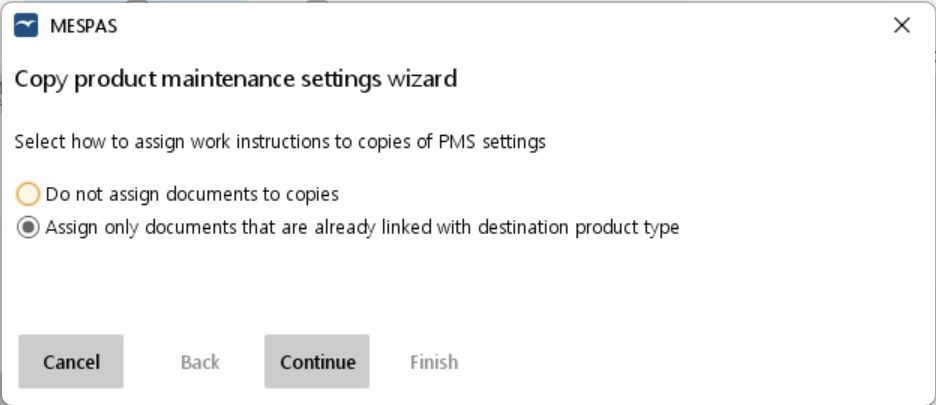 |
4.You are now asked if you want to copy the work instruction assignments together with the PMS settings or not. 5.Make your choice and click on "Continue" . |
 |
6.Select the product types where you want to copy the PMS settings to by setting the ticker in the column "Selected" 7.The Icon 8.You may filter for the brand or type designation by typing it into the "Search" field 9.Click on "Finish" |
|
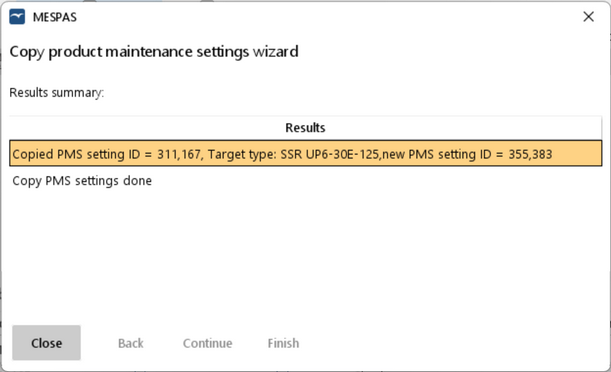
9. As a result, a summary view lists all the PMS settings that were copied. |


 .
.